Create WordPress Child Themes with Child Theme Configurator

Child themes are the best way to modify WordPress themes. With a child theme, you can add custom CSS styles and keep the original theme intact in case it needs to be updated in the future.
However, child themes aren’t always easy to create. In this post, you will learn how to generate them with just a few clicks, using the Child Theme Configurator plugin.
Before starting this tutorial, please keep in mind, that not every WordPress main theme may play nicely with a child theme. Always check with the parent theme developer if their template integrates with a child theme.
Let’s get started.
Step #1. Install Child Theme Configurator Plugin
- Login to your WordPress dashboard.
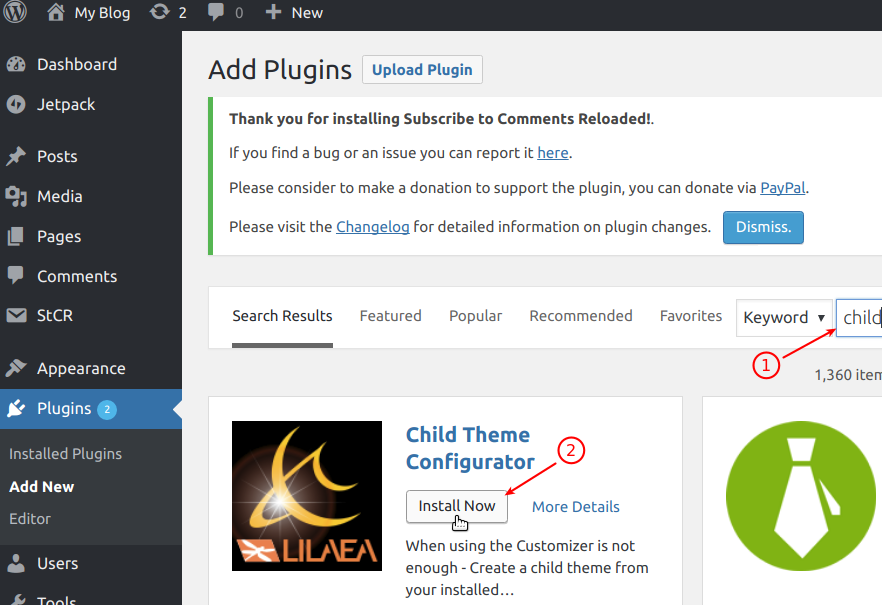
- Go to Plugins > Add New.
- Type in child into the Search box.
- You should now see the “Child Theme Configurator” plugin appeared. Click Install Now and then click Activate.

Step #2. Generate a Child Theme
In this step, you will generate your child theme. Following good development practice, you will have to preview, activate and publish it in the later stage.
- Go to Tools > Child Themes. You will be presented with the “Child Theme Configurator” plugin main screen:

- Under the Parent/Child tab, from the Select a Parent Theme field, select a parent theme you wish to create a child theme for.
- Click Analyze.
At this point, the plugin will run a check to determine if it can create a child theme for the theme you’ve selected.
Everything being well, you should see the This theme appears OK to use a Child theme message. You will also see the Click to show/hide raw analysis data gray button and a few numbered options appeared underneath the Analyze button.

- Leave all of the options in their default settings.
- Click Create New Child Theme.
You should see the Child Theme Twenty Seventeen Child has been generated successfully message.

You will also notice that a few new options appeared in the Select an options section.

- To ensure that your newly generated theme won’t break your site, click Preview your child theme link.

- You will be presented with the preview of your child theme and the Activate & Publish button. If you are happy with everything you see, click Activate & Publish:

You will see that the Activate & Publish button has changed to Published. Job done! You just successfully generated, previewed, activated and published your own WordPress child theme!
Now is a good time to backup it.
- Under the Parent/Child tab, click the Click here to save a backup of the selected theme link and save its ZIP file on your desktop.

Well done! You are now ready to start creating your own custom styles without touching your main theme.

Valentin, Thank buddy. I’ve been having trouble writing my own child style.css template. Don’t know much about CSS. I just found your post by accident and I’m glad i did. I just created a child theme in like 3 sec. thanks again. Josh MMB Local 1861 W La Habra Blvd #430 La Habra CA 90631 (562) 444-6336
Thank you thank you for updating this post! Easy to follow instructions. You helped unravel a process that has up til now been a mystery.
You are welcome, Rebecca! Glad to hear our tutorial has helped you.
Cheers,
Alex
Im building my first WP site. Before learning about this plugin, I first used the “Additional CSS” panel in Customizer. Upon learning about this plugin, I removed the CSS from the Additional CSS Customizer panel and saved it as a seperate css.doc. I installed the plugin and created the child theme. I pasted the css from the css doc back into into the child theme css and the styles took. However, when I go to add more css styles to the child theme css, they don’t appear when I refresh the site.
When I go back into the CTC plugin, I see the following message:
Your stylesheet has changed since the last time you used the Configurator. Please follow the steps for “CONFIGURE an existing Child Theme” under the “Parent/Child” Tab or you will lose these changes.
Not sure why I can’t see any additional css changes after the initial css additions.
Seems to be working now. Thank you!
Great post – super easy to follow with no issues. Thanks Valentin!